Thursday, May 27, 2010

Where Are All the Shorts?

Did I miss the memo about shorts being passé? Summer's coming and I need shorts. Not capris, but shorts. Apparently, my Beloved BWOF/BS doesn't think a plus size woman should wear shorts. I've looked through five years of back issues and I did not see one pair of shorts in the plus size range. Burda envelope patterns are a little more liberal in their opinions on what a plus size woman should should wear when it gets hot. I did find one possibility there. McCall's and Butterick must think it's perfectly okay for me to wear shorts. They each offered four patterns. Vogue … just one quirky Today's Fit pattern. I didn't look at Simplicity's options. (I can't bring myself to sew a Simplicity pattern. Don't ask.)

From this dizzying array, I narrowed it down to two choices.

The styles are essentially the same. In studying the envelope photographs, Burda 8087 appears to have more ease in the thigh than McCall's 5857. In addition, Burda 8087 is shown as mid-knee length; longer than I like, but easy enough to fix.

I'm very disappointed in the scarcity of choices. Yes, I'm larger than most women, but I can still tastefully wear shorts. At least I think I can. Maybe my Beloved BWOF/BS doesn't show plus size shorts for a reason. Maybe I should listen.


§ ∞ § ∞ § ∞ § ∞ § ∞ § ∞ § ∞ § ∞ § ∞ §

And speaking of five years of BWOF/BS back issues, I found a temporary solution to the storage problem I wrote about a year ago. I was quickly running out of space to store the back issues and I couldn't bear to get rid of them … or anything else for that matter. A few people suggested tossing the magazines and keeping only the pattern sheets and instruction pages. That's what I did. I saw a hanging file box the last time I was in Jo-Ann. This box will hold about 18 months of instructions and pattern sheets. I know eventually, I will have to get rid of something to make space. But, not right now.

Sunday, May 23, 2010

Finished: BPF SS-10-413 through 415 and BWOF 02-08-127

If this outfit had a theme song, it would be "The Long and Winding Road". This project took many turns on the way from concept to garment.

First, the road to the blouse …

The first turn on the road came when I noticed the blouse pattern was sized for petites. I'm 5'9". The differences in the length measurements (bust depth, front waist length, back length and sleeve length) were 3/4" or less. The alternations were easy, but annoying. I usually do (pivot and slide) pattern adjustments as I trace. For some reason, the (seemed like) 50 other pattern pieces on the sheet were more distracting than usual and the adjustments took longer than they should have. The road bent in another direction when I realized one of the variations was the bust length. Lowering the bust line on blouses is a regular alteration for me (when my ego lets me do it). Since this blouse was already drafted for a shorter torso, I decided this was the time to set my ego aside and include the alteration. That led to another bend in the road. This blouse had princess seaming and the only way I knew to lower the bust line was to lower the darts. I checked Fast Fit (Betzina, 2003) and learned how to alter the bust on princess seams. It was really a very easy process.

My original pattern choice was 414. I liked the flap and and top stitching (but not the belt). But, leave it to my beloved Burda to make things difficult interesting. The road forked again when I read the instructions and learned the center front panels on 414 are made with double layers of fashion fabric rather than a folded over facing. The center front was placed on the fold and grosgrain ribbon was sewn on the left front (a decorative and functional facing) with the buttons sewn on over the ribbon . Quite an interesting detail, but I turned away from that feature and took another fork in the road. 415 had the folded front facing I'm used to so I traced that front and followed those directions. I also preferred the rolled up sleeve on 413. I combined the preferred details from three similar patterns to come up with my blouse. And since I was going into so many directions at once, rather than confuse myself changing lanes between three sets of directions, I made up the directions as I went along.

And then came the pants …

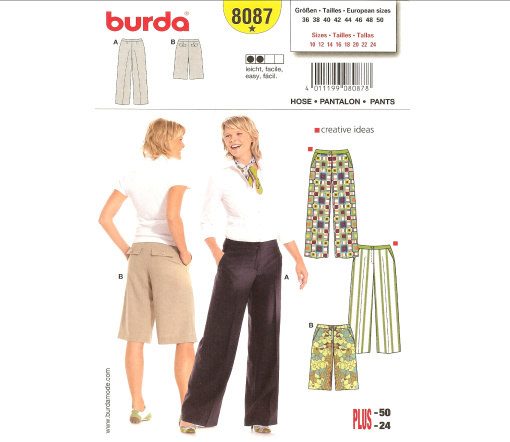
… and yet another detour in the Long and Winding Road. When I bought the fabric for these pants I was thrilled. I searched among the fabric at JoMar and found a real bargain – quality fabric for $1.60 a yard. However, it was stored on a roll and I didn't realize it was only 44" wide. I would have noticed if it had been wrapped on a bolt. Consequently, I didn't have enough fabric to make my first choice pants. I didn't realize I was short on fabric until I'd already traced the pattern and laid it out. I switched destinations and went for capris instead. Still, it was a tight squeeze getting all the pieces on the fashion fabric. I had to use gray pocketing for the pockets and inside waistband.

This journey was made even longer by a side trip through PR Weekend. I started this project several days before PR Weekend and finished it several days after. For two days, rather than sewing, I was socializing and shopping with other sewing enthusiasts. Then, for the next two days, I was recovering from all the socializing and shopping. It was tremendous fun, but it added four days to the trip to a finished outfit. The journey might not be over. After looking objectively at the pictures, I might shorten the blouse … and maybe the pants, too. Some journeys never end.

Sunday, May 16, 2010

PR Weekend 2010: Philadelphia

Disclaimer: In addition to being a participant, I was a volunteer/organizer. Opinions expressed are completely biased.

Click photographs to enlarge.


It was wonderful to meet, spend time with, and shop with people who are as obsessed with sewing as I am. I could openly talk about presser feet, bobbins and tracing wheels with people who understand my obsession. Sewing is a solitary pastime. I go in my sewing room, close the door to keep the cats out, and stay locked away, sometimes for hours. I can't even hear the doorbell when I'm in the sewing room. Even though I probably will never use the embellishment technique from Kenneth King's workshop, it was, for me, a high point of the weekend. Sharing the experience with a room full of other enthusiastic sewers was a rare pleasure. Sewers are the most supportive, generous and fun people one could hope to meet.

Friday Morning, May 14
Friday was my favorite day of the weekend. On Friday morning, Kenneth King entertained us while he taught us his embellishment technique using trim, rat tail, beads. I encourage anyone who has the opportunity to take a workshop with Kenneth. I was thrilled to have my copy of Cool Couture autographed (and to hear the backstory about the cover photograph).

Kenneth King brought inspirational examples of his work.


My embellished sample from the workshop.


Friday Afternoon, May 14
We got up close and personal with garments from the "Great Designers" exhibit at the Philadelphia Museum of Art. And when I say "up close", I mean up close! My fingers were less than an inch away from Worth, Chanel, Fortuny, and Schiaparelli garments.

My personal favorite was the Schiaparelli dinner jacket.


Saturday, May 15
Saturday was shopping day. We visited three sites. Philadelphia's "garment district" is called "Fabric Row" and is on Fourth Street below South St. Then we traveled to Cherry Hill, NJ to London Textiles for designer and imported fabrics. Finally, we ended our shopping at the fabled JoMar. Since I live in the Philadelphia area, I was familiar with two of the three planned shopping sites. But, I was happy to learn about London Textiles in New Jersey. They sell high end fabrics at not greatly discounted, but reasonable prices. The best bargains were found in the boxes of remnants at the front of the store. Normal business days are Monday - Friday, but they were kind enough to open on a Saturday especially for PR members. I can say without reservation, we made it worth their while. Now that I know about this place, I plan to go back.


Like most attendees, I bought something at every stop. On Sunday morning, I fondled my purchases and gave them their assignments.


lavender linen-look for a blouse
(Fabric Row)

black print lightweight twill for skirt
(London Textiles)

poly-cotton print for summer blouse
(JoMar)

rayon print for summer blouse
(London Textiles)

lightweight cotton twill for dress or pants
(JoMar)

knit print and khaki twill will be saved for fall sewing
(Fabric Row)

Notice – only two of the seven pieces are intended to be coordinates! Quite a change from my usual shopping MO. As of today, I have 13 (OMG!) pieces of fabric in my queue! This is the first time I've reached double digits.

Karen did an outstanding job as organizer and everything ran smoothly. In my official role as "Transportation Manager", I must give special mention to Connie and Andrea! These women selflessly provided transportation for attendees who could not be accommodated on the school bus and who had train connections that could not be missed. Silknmore served as navigator and co-pilot for Connie, our self-proclaimed "token Canadian". I consider these women to be the MVPs of the PR Weekend.

As one the Philadelphia hosts, I hope everyone had as much fun as I did! I look forward to attending another PR Weekend, if geographically feasible.

Friday, May 7, 2010

Finished: BS 02-10-137

I really love the design details of Burda Style plus size patterns. Big Four plus patterns are usually more bland and if you want unique details, you have to add them yourself. This long sleeved blouse has a cuff, but no placket, which I think is an interesting detail. I also liked the pleated frill, even though I didn't use it.

I can't explain why I am so determined to conquer Burda magazine instructions. I want to be able to read the instructions, use Burda's methods as presented, and sew the garment without consulting any outside source and without scratching my head in confusion. It's a neurotic compulsion, I guess. There were no particularly puzzling parts in the directions for 02-10-137. There was a major omission, though. After reading these instructions several times and I never saw an instruction that said, "sew the side seams." Of course, anyone would know to sew the side seams, but an omission of that magnitude might make a BurdaNewbie a little nervous.

I was drawn to this pattern because of the pleated trim around the front band and sleeve. I never assumed I would have found pleated trim to match any fabric I might buy or already own. I also never considered pleating strips of fabric myself. Burda recommends having the fashion fabric "commercially pleated: triple pleats, pleat width 1 cm." I imagine the commercial pleater would know what all of that means. I don't. I liked the detail even though I knew I couldn't produce it. My daughter brought back this fabric from Morocco, along with the matching trim. I really wanted to include the trim in whatever project I chose for the fabric, so I put the braided trim where the pleated trim would have been.

The fabric is light and breathable crinkled cotton – perfect for warm weather in spite of the long sleeves. Whenever I get the opportunity to sew natural fibers, I swear I will never sew man-made fibers again. I really enjoy working with fabrics that press easily and are stable.

This blouse was made to be a knock-around-the-house blouse so I don't have to be concerned about coordinating pants.

Saturday, May 1, 2010

Finished: BS 01-10-133

I decided I needed a new white blouse for the occasions I usher at a local theater. I started the blouse in plenty of time for my next scheduled usher duty. However, my machine started making frightening noises so I stopped working on the blouse and immediately took it in for repair. Luckily, it only needed routine cleaning and I got it back just in time to finish the blouse.

According to the description, "Its hip length – with tucked folds front and back – cleverly conceals any slight bulges." Sounds like my kind of blouse! I used a white tone-on-tone shirting cotton for this blouse. I love working with natural fiber fabrics that are easy to press.

Just when I thought I had mastered Burda instructions, I encountered a problem. When I read "Baste piping to front, on joining edge of insert " it seemed contradictory. Do I baste the piping "to front" or "on ... insert"? I went for the on insert interpretation. Wrong. It wasn't until I later read "Lay front inserts on joining edges of fronts, next to piping cord", that I realized my mistake. A picture certainly would have helped. I know now I will never master Burda's directions.

I was excited about making and inserting piping for this blouse. I used The Complete Book of Sewing for instructions on making the piping. I liked this method because the allowance on the piping was exactly 5/8" and this made it very easy to insert the piping. After being misled my Burda directions for the piping on the front insert, I used the method described in Kenneth King's Cool Couture for inserting the piping on the collar. This was the first time I actually used the book for a specific technique. I found King's directions easy to follow and I was very happy with the results. When I meet Kenneth King in person at PR Weekend in Philadelphia and ask him to sign my copy, I can honestly say I've successfully used the technique.

When my machine got sick, I was really tempted to run out and buy a back-up machine. But, the money I'd spend on a back-up machine would be better spent on the repair. Then, I tried to buy a RTW white blouse. Naturally, because I desperately needed a white blouse, I couldn't find one I liked. I was thrilled to get my machine back in time to finish this blouse.


• § • § •§ • § • § • § • § • § • § • § • § •

How often do you clean and oil your machine? I took my machine in for repair because it was clunking very loudly and the door to the the bobbin compartment kept popping open. The clunking was caused by an accumulation of lint in the bobbin area. My machine has a LCD screen on which an icon appears when it's time for oiling and cleaning. When ever the icon appeared, I stopped sewing to oil and brush out the bobbin area. According to my dealer, I shouldn't wait for the icon. I should be oiling and cleaning after every three garments. And if I were to be lucky enough to go on a sewing retreat where I would be sewing all day, I should clean and oil every evening of the retreat! I had no idea machines required that much maintenance. I learned long ago to change needles after about 8 hours of sewing. I guess I'll have to get into the habit of oiling and cleaning when I change needles.