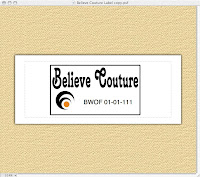
Materials needed:
- Iron-On transfer paper
- Packaged Quilt binding or Wide single fold bias tape
- Any desktop publishing or word processing software that makes labels


- Design your label using the desktop publishing or word processing software. I chose the layout for 1" x 2 5/8" mailing labels but the finished size is less than the 2 5/8" width so it will fit on the quilt binding. In addition to my "Brand Name" and logo, I include pattern information on the label. If I want to make a particular garment again, I won't have to guess or remember what pattern I used.
- Print the labels on the transfer paper following the manufacturer's instructions. Remember to flip or reverse the image. If you forget this step, the text will be backwards when you press it onto the label. I make labels one at a time, as needed, and print them from the bottom of the transfer paper so the clean, uncut end of the paper can feed first into the printer after some labels have been cut off.
- Cut the quilt binding or bias tape to the desired length. If using quilt binding, open out the center fold and iron out the center crease to allow maximum area for the image. Fold the quilt binding in half, place the image near the bottom fold and sew the raw edges into a seam. If using wide bias tape, fold in the ends and sew the folded sides of the label directly to the garment. (see arrows; click photo to enlarge)
- Cut-out the image and position it on the binding.
- Press and transfer according to the manufacturer's instructions.


These steps are just guidelines. You can experiment and come up with a label that suits your needs. I think custom labels add a classy finishing touch to a garment. I'd love to see the designs other sewers come up with so I can copy admire them.
ETA Re: Nancy's comment about ironing - the instructions for the transfer paper warn against ironing directly on the label. They suggest using a silicone sheet. With careful ironing from the right side, I haven't encountered this problem.
ETA Re: Nancy's comment about ironing - the instructions for the transfer paper warn against ironing directly on the label. They suggest using a silicone sheet. With careful ironing from the right side, I haven't encountered this problem.


Love it! This is a great alternative to custom labels, thank you for posting how you made them!
ReplyDeleteThis is a great way of making labels. Thank you for the information :)
ReplyDeleteYou're so SMART! Love that bias tape idea, and also the pattern info that looks like a store code. ;-) Thanks for the details. I hardly ever use prefold bias but I inherited some from someplace. Now it has a purpose.
ReplyDeleteWhat a brilliant idea! I can't wait to try this. Thanks for the tutorial.
ReplyDeleteI have actually made labels like this, but when I ironed them later, the ink tended to smear. I'll have to try bias tape, I think I made mine on a twill tape and maybe it was polyester. I'll have to give it another shot.
ReplyDeleteBrilliant! I too, will be stealing your idea. :)
ReplyDeletegreat idea, Elaray! Thank you for sharing!
ReplyDeleteCLE-VER!!! Thanks for sharing
ReplyDeleteThank you for sharing this idea and taking time to write up a tutorial! I linked to it from my blog.
ReplyDeleteWhat a great idea.
ReplyDeleteI have been printing on the printable fabric, using the label software, then cutting with pinking shears. Then turn the ends in, sew onto a piece of the facing fabric, and sew that on.
Your process seems soooooo much easier! And the idea of the pattern number is great.
Thanks for the wonderful ideas.
Now why did I never, ever think of this. So glad you posted this tutorial. You are very clever! Thanks for sharing this great idea!
ReplyDeleteElaray, thank you!! This is absolutely great; custom-made labels are very expensive if what want you want doesn't fit their templates (mine doesn't,'natch), so I've been wracking my brains for an alternative. This is clearly it!
ReplyDelete